Unable To Connect To The Proxy Server
1] Remove or Reconfigure Proxy
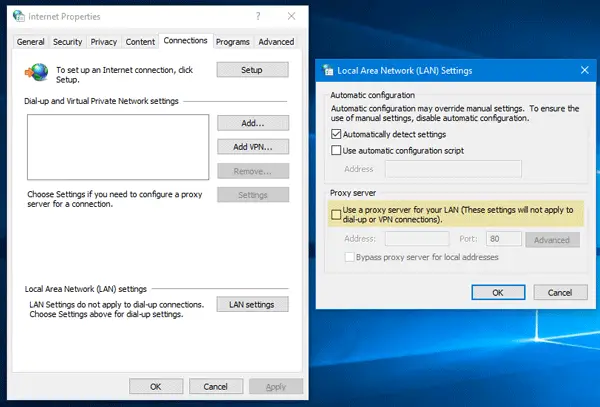
Press Windows Key + R then type “inetcpl.cpl” and hit enter to open Internet Properties.Next, Go to Connections tab and select LAN settings.Uncheck Use a Proxy Server for your LAN and make sure “Automatically detect settings” is checked.Click Ok then Apply and reboot your PC.
If you are using a third-party proxy service, make sure to disable it. If you are the website owner who is using Proxy software for your website, make sure to check the configuration of the software.
2] Flush DNS, reset Winsock and reset TCP/IP
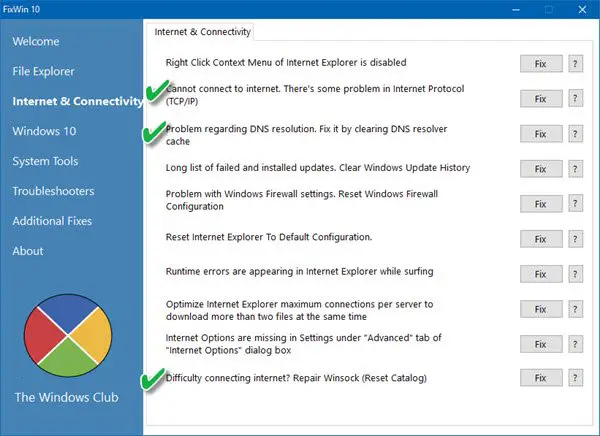
Sometimes the websites don’t resolve because the DNS in your PC still remembers old IP. So make sure to Flush the DNS, Reset Winsock and Reset TCP/IP.
You can also use our freeware FixWin to carry out these three operations with a click.
3] Run Network Troubleshooters
See if any one of these 5 Network Troubleshooters are able to help you fix the problem.
4] Use Google Public DNS
If it does not help, use Google Public DNS and see if that works for you. You need to explicitly change the DNS settings in your operating system use the DNS IP addresses. Whenever you type the domain name into the browser, it is a known fact that DNS will look for the IP address of the domain name and return the result to you.
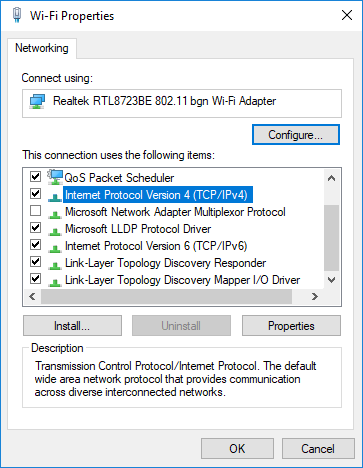
First of all, right-click on the taskbar Network icon and select Network and Sharing Center.Select “Change Adapter Settings”.Search for the network connection that is used to connect to the internet; the option might be either “Local Area Connection” or “Wireless Connection”.Right-click on it and click Properties.Choose the new window to select “Internet Protocol 4 (TCP/IPv4)” and then click the Properties button.Click the checkbox for “Use the following DNS server addresses” in the new window.Enter in 8.8.8.8 and 8.8.4.4Finally, click OK and exit.
We hope one of these tips helps you get rid of the error.


