Why is Windows not assigning Drive letters?
There are certain services and features that allow your computer to function normally, that is to install the driver, assign a drive letter, etc, when a new driver is installed. So, you need to check them and see the ones meant to be enabled are enabled and the ones that should be disabled are disabled.
Windows not assigning Drive letters automatically
If Windows is not assigning Drive letters automatically, then follow these suggestions to fix the issue: Let us talk about them in detail.
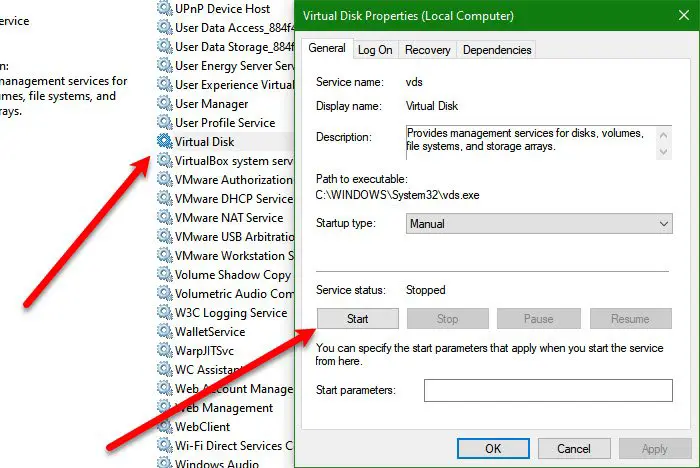
1] Enable Virtual Disk
If the Virtual Disk service is disabled on your computer, you will face many disk issues including letters not being assigned to the installed disks. Hence, you need to enable it. To do that, you can use the following steps. There is another way to enable the service in question. That’s by executing some commands. So, open Command Prompt as an administrator and run the following commands. Run the following command to know the status of Virtual Disk Service. Now, to enable it, run the given command. Finally, try reinstalling the driver(plug-out and plug-in) and see if the issue persists.
2] Check if Automatic Mounting of New Volumes is enabled
If the issue still persists after executing the first solution, you need to make sure that Automatic Mounting of New Volumes is enabled, otherwise, letters won’t be assigned to drives. To do that, open Command Prompt as an administrator and use the following command to enter Diskpart. Afterward, we need to check if automount is enabled, for that, execute the following command. Now, enable it with the help of the following command. Finally, exit Diskpart with the following command. Now, you can restart your computer and check if the issue persists.
3] Make sure to disable ‘Hidden’ and ‘No Default Driver Letter’
If you are still not able to see the drive letter then maybe your “Hidden” and “No Default Drive Letter” attributes of that particular volume are enabled. So, disable them with the help of the given commands. Note: Change ‘1’ with the number associated with your disk. If you can’t fathom which disk to choose, look at their respective sizes to get a clear idea. Note: Don’t use the above command, if you don’t have more than one partition. Note: Replace ‘2’ with the number associated with the partition in question. Now, see if “Hidden” and “No Default Drive Letter” attributes are enabled, if they are, run th following commands simultaneously. Finally, type ‘exit’, hit Enter, restart your computer, and see if the issue persists. Hopefully, you are able to fix the error with the help of the solutions given in this article. Read: How to Show Drive Letters first before Drive Names in Explorer.
How to manually assign a Disk?
To assign a letter manually or change the letter you need to perform the following steps. That’s it! Read Next: USB 3.0 External Hard Drive not recognized in Windows.